The Ultimate Guide to Baking a Flawless Dot Cake
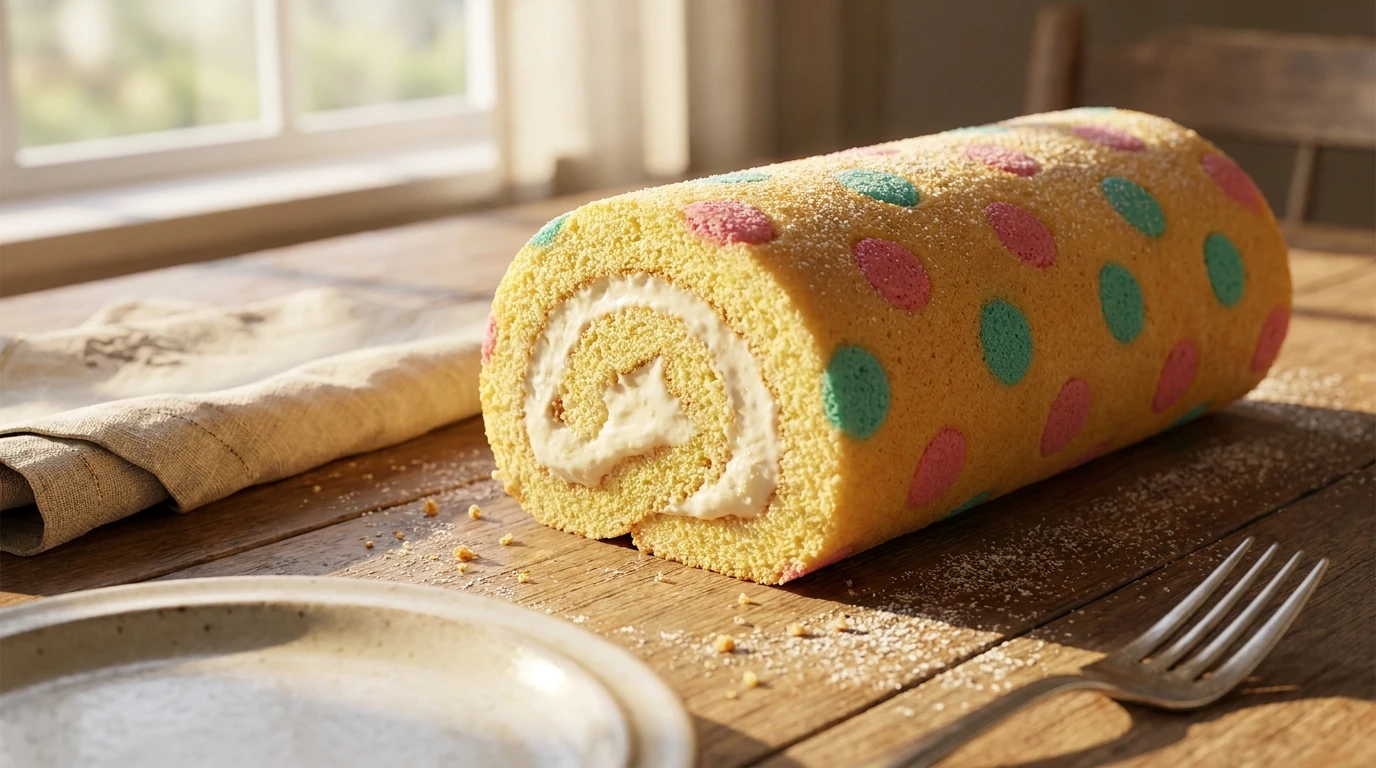
Creating a perfect Dot Cake requires meticulous precision, but the visual and culinary payoff is absolutely staggering. When you present a beautifully patterned sponge with vibrant circles baked directly into the crust, you instantly elevate your dessert from ordinary to extraordinary. A Dot Cake is essentially a specialized sponge roll or layer cake where tinted batter is piped onto a baking mat, partially set, and then covered with a contrasting base batter. Once baked and peeled away from the mat, the striking design reveals itself seamlessly integrated into the delicate cake.
Culinary aesthetics move incredibly fast, and as we navigate the baking trends of 2026, precision-patterned desserts have firmly taken the spotlight across professional bakeries and home kitchens alike. Pastry enthusiasts are stepping up their game, moving aggressively away from heavy, overly sweet fondants and focusing intensely on the actual sponge itself. The core appeal here is incredibly straightforward: the intricate decoration is baked right in. You achieve maximum visual impact without sacrificing the light, airy texture or the delicate flavor profile of the dessert. The entire methodology might seem slightly intimidating at first glance, but breaking it down reveals a highly logical, deeply satisfying step-by-step process. Whether you are prepping for a spectacular birthday celebration, designing a sophisticated dinner party menu, or simply challenging your own technical pastry skills, mastering this sponge technique will permanently upgrade your repertoire. Success relies entirely on understanding your ingredients, gathering the proper equipment, and maintaining strict control over your batter consistency.
Read also: Building the Perfect Tobacco Shed Guide; The Best Aberdeen Sausage Recipes; Why Fissler Cookware Is The Best Kitchen Upgrade.
Why You Need to Master the Patterned Sponge Technique
The primary structural benefit of baking a patterned sponge lies in the incredible durability of the final design. Unlike traditional buttercreams or delicate glazes which melt, smudge, or lose their shape under varying room temperatures, a baked-in pattern remains absolutely pristine. You can stack, roll, slice, and transport the finished dessert without fearing that your hard work will be ruined by a slight bump. For example, a Rainbow Dot design utilizes six different bright primary colors piped onto a stark white vanilla sponge, creating a vibrant, highly engaging cake roll that survives travel effortlessly and delights younger guests. Another brilliant and highly requested application is the Chocolate Truffle Dot, where rich, dark cocoa batter circles are meticulously embedded into a light, airy espresso-infused sponge. This offers a highly sophisticated, elegant visual contrast specifically tailored for adult palates at formal gatherings.
To execute these specific designs flawlessly, understanding your coloring agents is paramount. Let us compare the most common methods for achieving those sharp, vibrant circles:
| Coloring Agent | Ease of Use | Color Intensity and Batter Stability |
|---|---|---|
| Concentrated Gel Paste | Extremely High | Provides brilliant, vivid colors without adding excess moisture, maintaining perfect batter consistency. |
| Liquid Supermarket Dye | Moderate | Weak color payoff and adds too much liquid, frequently causing the piped pattern to spread and bleed. |
| Natural Powders (Matcha, Beetroot) | High | Offers beautiful, earthy tones and subtle flavor additions, but requires careful sifting to prevent lumps. |
Before you even think about preheating your oven, you absolutely must gather the correct technical equipment to ensure success. Precision is key, and substituting these items will often lead to messy results.
- High-Quality Silicone Baking Mat: Parchment paper wrinkles and ruins the smooth surface of the sponge. A perfectly flat silicone mat guarantees a seamless release and sharp edges.
- Disposable Piping Bags: You need multiple small bags for different colors, allowing for controlled, precise application of the circles without creating air bubbles.
- Large Offset Spatula: Essential for spreading the final base batter over your delicate, flash-baked pattern without dragging or smudging the underlying design.
Origins of Polka Dot Baking
The fascinating journey of the patterned sponge traces its most distinct roots back to the highly disciplined world of Japanese pastry arts. In the late 2000s and early 2010s, the concept of the “Deco Roll” exploded in popularity across Tokyo bakeries. Pastry chefs sought innovative ways to modernize the classic European Swiss roll, adapting traditional genoise and chiffon methods to incorporate playful, highly visual elements. By piping tinted batter into specific shapes directly onto the baking tray before pouring the main sponge, they eliminated the need for heavy external frostings. The polka dot pattern quickly emerged as the most iconic and universally beloved design due to its geometric simplicity and striking visual contrast.
The Evolution of Patterned Cakes
As this innovative technique migrated westward, European and North American home bakers began adapting the Japanese deco roll methodology for wider applications. Initially, bakers struggled with dense batters and bleeding food colors, often resulting in muddy, unrecognizable shapes. The evolution required a fundamental shift in recipes, moving from traditional heavy pound cakes to specialized chiffon and aerated biscuit sponges. These lighter formulations provided the necessary structural flexibility to be rolled or manipulated without cracking, while also acting as the perfect blank canvas to showcase the brightly colored embedded designs.
The Modern State of Decorative Sponges
Now, firmly entrenched in the culinary landscape of 2026, the technique has reached unprecedented levels of sophistication. Advanced home bakers no longer rely solely on freehand piping; they utilize digitally printed stencils placed beneath translucent silicone mats to achieve laser-accurate geometric perfection. The modern patterned dessert is no longer restricted to just roll cakes, either. We see these vibrant, dotted sponges utilized as intricate exterior wrappers for complex mousse entremets, towering layer cakes, and highly architectural plated desserts. The method has transitioned from a niche internet trend into a foundational pastry skill taught in advanced culinary workshops globally.
The Chemistry of Colored Batters
Executing this visually stunning dessert requires more than just following a basic recipe; it demands a solid grasp of baking chemistry. When you tint a small portion of your batter to create the design, you are fundamentally altering its chemical makeup. The specific gravity of the piped colored batter must closely match the specific gravity of the main sponge batter. If the tinted batter is significantly denser, it will sink heavily into the base, distorting the circles. If it is too light, it may bake unevenly and separate from the crust entirely. Achieving this balance relies heavily on the proper stabilization of the egg white meringue, ensuring the tiny trapped air bubbles are uniform and secure.
Temperature Control and Batter Density
Thermodynamics play a massive role during the critical “flash bake” phase. The goal of flash baking is to rapidly coagulate the proteins in the piped dots just enough so they hold their shape, without initiating the Maillard reaction which would brown and ruin the vibrant colors. Managing your oven temperature with acute precision ensures the design sets perfectly before the heavier main batter is introduced.
- Protein Coagulation: Egg whites begin to solidify at exactly 140°F (60°C). The initial flash bake forces the exterior of the piped circles to form a micro-crust, sealing the shape.
- Preventing the Maillard Reaction: By keeping the oven temperature moderate and the baking time incredibly short, you prevent the amino acids and reducing sugars from caramelizing, which keeps the colors exceptionally bright.
- Viscosity Matching: Using concentrated gel colors prevents the introduction of excess water, keeping the viscosity (thickness) of the colored batter identical to the uncolored base, preventing ugly bleeding.
- Fat Stabilization: Incorporating a small amount of neutral oil rather than butter ensures the sponge remains highly flexible even when chilled, preventing the dreaded cracking when rolling.
Step 1: Prep the Base Batter
The foundation of your dessert begins with a flawless chiffon sponge. Start by meticulously separating your room-temperature eggs. Whisk the yolks with a portion of superfine sugar until pale and thick. In a separate, impeccably clean metal bowl, whip the egg whites to firm, glossy peaks, gradually adding the remaining sugar. Gently fold the sifted cake flour and a touch of neutral oil into the yolk mixture. Finally, sacrifice a small scoop of the meringue to lighten the yolk base before folding in the remaining egg whites with large, sweeping motions to preserve maximum aeration.
Step 2: Tinting the Dots
Extract exactly one cup of your finished, aerated batter and place it into a separate mixing bowl. Using a toothpick, add minute amounts of high-quality, professional gel food coloring until you reach your desired vibrancy. Gently fold the color in using a flexible silicone spatula, being incredibly careful not to deflate the fragile air bubbles you just worked so hard to create. Once perfectly uniform in color, transfer this tinted batter directly into a disposable pastry bag fitted with a small, round metal piping tip.
Step 3: Piping the Pattern
Prepare your heavy-duty baking sheet by laying down a premium, perfectly flat silicone baking mat. If you are using a paper stencil guide, ensure it is placed completely flat beneath the translucent mat. Hold your piping bag at a strict 90-degree angle to the surface. Apply gentle, consistent pressure to pipe perfectly round, uniform circles across the entire mat, leaving adequate negative space between them. Lift the bag sharply after each circle to avoid dragging unsightly tails of batter across your clean silicone surface.
Step 4: First Flash Bake
This is the most critical technical step in the entire process. Preheat your oven precisely to 325°F (160°C). Place the baking sheet with the piped design into the center of the oven for exactly two to three minutes. You are not trying to fully bake the batter; you only want the surface of the dots to become matte and dry to the touch. Keep a very close watch, as leaving them in even one minute too long will cause the edges to brown and harden unpleasantly.
Step 5: Pouring the Main Sponge
Remove the baking tray from the oven and allow it to cool on the counter for exactly sixty seconds. Take your remaining uncolored base batter and pour it generously and evenly directly over the flash-baked pattern. Using a large, flat offset spatula, gently spread the batter out to the edges of the silicone mat. Use an incredibly light touch; you must smooth the top layer without ever letting the metal spatula scrape or disturb the delicate, partially baked circles resting underneath.
Step 6: Final Oven Bake
Tap the baking sheet firmly on your kitchen counter two or three times to force any trapped, large air bubbles to the surface, which prevents hollow pockets in your final cake. Return the entire tray to the 325°F (160°C) oven and bake for approximately 12 to 14 minutes. The sponge is fully cooked when the center springs back instantly when lightly pressed with your index finger. Avoid overbaking, as a dry sponge will immediately crack and shatter when you attempt to manipulate or roll it later.
Step 7: Cooling and Peeling
Immediately upon removing the pan from the oven, lay a clean sheet of parchment paper directly over the surface of the hot cake. Place a wire cooling rack on top and swiftly invert the entire tray. Carefully lift away the hot baking sheet. Now, starting from one corner, slowly and gently peel the silicone baking mat back at a sharp angle. As the mat releases, your flawlessly baked, vibrant pattern will be revealed in all its stunning glory. Allow the sponge to cool completely with a fresh towel draped over it to retain essential moisture.
Debunking Common Baking Myths
Myth: Liquid food coloring works just as well as expensive gel pastes for tinting batter.
Reality: Liquid dye adds severe amounts of excess moisture to your delicate mixture, radically altering the specific gravity of your piped batter. This always causes the pattern to spread out, bleed into the background, and ruin the crisp edges.
Myth: You must purchase expensive, specialized metal pans to achieve a perfectly flat patterned sponge.
Reality: Any standard, heavy-gauge aluminum baking sheet works perfectly, provided you pair it with a high-quality silicone baking mat to ensure a perfectly smooth, unwrinkled baking surface.
Myth: The colored circles will always bleed into the white base batter while baking in the oven.
Reality: The dedicated flash baking step completely prevents this. By partially setting the piped design first, the heat creates a protective barrier that absolutely prevents the two distinct batters from bleeding into one another.
Can I freeze a patterned sponge?
Yes, absolutely. Once completely cooled, wrap the unrolled flat sponge tightly in a double layer of plastic wrap and store it flat in the freezer for up to one month. Thaw gently at room temperature before filling.
Why did my colored circles burn?
Your oven temperature was likely running significantly higher than the dial indicated, or you left the tray in the oven for too long during the initial flash bake phase. Always use a standalone internal oven thermometer.
How do I prevent the cake from sticking?
Never bake this delicate recipe directly on parchment paper, which wrinkles. Always utilize a high-quality silicone baking mat, and ensure you peel it off immediately while the dessert is still warm and flexible.
What are the best flavor combinations?
A classic vanilla sponge pairs beautifully with freshly whipped heavy cream and macerated strawberries. For something richer, pair a vibrant pink sponge with a dense, dark chocolate ganache filling.
Do natural food dyes work?
They certainly do, but they require adjustments. Freeze-dried raspberry powder or high-grade culinary matcha provide gorgeous earthy colors, though the final hues will be slightly more muted than synthetic gels.
Are there gluten-free alternatives?
Yes. You can easily substitute the standard cake flour with a premium 1-to-1 gluten-free baking blend that contains xanthan gum. Ensure the blend is sifted exceptionally well to prevent heavy clumps.
Can I use standard pancake mix?
Absolutely not. Standard mixes lack the necessary structural integrity, precise aeration, and correct egg-to-flour ratios required to support an embedded design. The batter will spread, sink, and ultimately fail.
How long does the baked dessert last?
Once filled and carefully wrapped, the finished dessert will stay exceptionally fresh and moist in the refrigerator for up to three days. Keep it stored in an airtight pastry container to prevent it from absorbing fridge odors.
Mastering this highly specialized technique completely redefines what you can accomplish in your home kitchen. The precision required might demand a bit of initial patience, but revealing that impeccably sharp, vibrant design as you peel back the silicone mat is an unparalleled culinary thrill. Gather your gel colors, prepare your silicone mats, and start practicing your piping skills today. Your guests will be absolutely astounded by the professional, breathtaking results you bring to the table!